5 HELPFUL TIPS TO MAKE THE POST OF YOUR CSA BOX
06/11/21 — Ada Broussard
Post graciously written by CSA Member, Ivette Irizarry.
![]() This bok choy salad by recipe developer Mackenzie s perfect as is. When the bok choy disappears from your box,, substitute it all together for cucumber or raw zucchini, and you have a more summery-version. When in doubt, make a raw salad with your CSA veggies. Recipe and photo by Mackenzie Smith Kelley.
This bok choy salad by recipe developer Mackenzie s perfect as is. When the bok choy disappears from your box,, substitute it all together for cucumber or raw zucchini, and you have a more summery-version. When in doubt, make a raw salad with your CSA veggies. Recipe and photo by Mackenzie Smith Kelley.
If you are not used to getting produce delivered regularly it can feel a little overwhelming at first. It’s nothing like your TP subscription with Amazon. That stuff can pile up in your garage no problem. But the beautiful produce from your JBG Organic CSA membership is — gasp — perishable!
Panic sets in. What do I do with all these veggies? How do I store them? What will I cook with them?
Never fear. Follow me as I “unbox” my veggies and you will find tips to help you make the most of your CSA share.
When I get my box, it’s like getting a new jigsaw puzzle. I open it right away and start sorting all the pieces. Depending on your puzzle personality you may start sorting by color, or straight edges. You start to build knowing you can look at the photo on the box if you get stuck.
Well, JBG has taken care to build a really helpful website. Visit their veggie guide page to get advice on how to store and prepare each vegetable. In fact, you can just keep this page open in your browser as you go through your box and look up what to do with each item as needed. Just like the cover of that puzzle box.
First, I take everything out and take inventory. Because I know the box is coming, I make sure not to overdo it at the supermarket in the days leading up to the delivery. It’s easy to plan for this if you are a CSA box-stalker like me, because you can find what is coming in your share with their handy seasonal chart, and the guide which shows you the box week by week.
Ok. Here we go, let’s open the box.
Ooohhh!!!! — clappy hands emoji — I am super excited to see baby bok choi! I grab a few of these bright orange carrots, run to the sink, and wash them. I munch on the super sweet carrots while I write down a list of ideas of what to make with my new toys… I mean, veggies.
Making a list of ideas on note paper that you can stick on your fridge with a magnet is a great first step. It not only helps you use up your veggies, but it also helps you menu plan your week ahead.
![]() Take inventory. Which veggies do you know well? Which ones stump you? Protip: Simply google the vegetable that stumps you in addition to any other ingredients in your fridge that need using up. This is an easy way to get some recipe inspiration. For this box, for example, you might search "squash, peppers, eggs". Only google knows what recipe you might cook!
Take inventory. Which veggies do you know well? Which ones stump you? Protip: Simply google the vegetable that stumps you in addition to any other ingredients in your fridge that need using up. This is an easy way to get some recipe inspiration. For this box, for example, you might search "squash, peppers, eggs". Only google knows what recipe you might cook!
Let’s see what’s inside. Parsley and cilantro right away screams chimichurri to me. I could put chimichurri on anything. My recipe is similar to this one from JBG, with the addition of a teaspoon (or four) of finely minced capers. Also, I hand-chop. I like the texture better. Leafy herbs are super delicate so I know I want to wash those, trim the very bottom of the stems and put them in a jar of water. Mañana we chimichurri.
Red and green lettuce came in a bag that I toss in the fridge without looking. We eat lettuce every day. It’ll be gone before I know it. I could pickle the radishes but I love to slice and use those as confetti. So I just wash them. (And I remember to toss the green basket-y thing they came in to return with my box. Gotta reuse that!)
Sometimes leafy greens like kale and chard look like they need some TLC. Don’t worry, they’ve been traveling in a box in a truck. It’s like when you wake up at 4 am to catch a 6 am flight. By the time you land you need a little sprucing up too. A few minutes in a bowl with icy water and they perk right up.
The kale is pleading with me to make some “Caldo Gallego.” I tear it off the stems, put it in a zip bag that I flatten, and toss it in the freezer. No blanching required. Sometimes I freeze the stems to use in pesto, but today I’m feeling generous and toss them to my chickens. I could freeze the chard, but I think I am going to stew them into Acelgas Guisadas.
If you’ve been around for any length of time, you know there’s going to be some beets in that box, am I right? Those used to drive me crazy, but now unless I already have a specific plan for them, I just scrub them, toss them in my rice/slow cooker with enough water to cover by 1 inch, and set it for 2 hours (the shortest time on my machine). But it doesn’t take that long, especially if they are not very big, or you don’t have that many. Start checking them at 20 minutes. You get the same result using a saucepan and water on your stove. No fancy required.
When they are tender I let them cool, peel them and store them in a container in the fridge. Now that they are cooked I know I can grab, chop and toss into a dish whenever I feel like it. The JBG website has lots of ideas of what to make with beets in your CSA share.
I know what you’re thinking, “Oh, but beets are so delicious when roasted, or steamed or…” Yes, there are so many “better” ways to prepare them. But I find that if I overthink it I just don’t use them.
![]() Chef and CSA Member Taylor Chambers knows a thing or two about steaming beets. We love his no-frills advice for making use of your beets that he shared in a spotlight so many years ago. Click the photo to read the full story.
Chef and CSA Member Taylor Chambers knows a thing or two about steaming beets. We love his no-frills advice for making use of your beets that he shared in a spotlight so many years ago. Click the photo to read the full story.
Don’t wait to use the items in your share box. Pick something and use it today.
When I was through sorting my veggies, it was time to start dinner. We had some leftover homemade shrimp fried rice in the fridge, so I prepped some carrots, along with the baby bok choi, and threw together a quick veggie stir fry to serve with the rice. Topped it with my ‘radish confetti’. About 15 minutes later... “Dinner is ready!” A fresh, healthy meal made with local organic produce. It’s that simple. And I love it.
How do YOU make the most of your CSA share? I would love to know. Want the recipe for Caldo Gallego? Let me know in the comments below.
![]() Ivette's acelgas guisadas - a breakfast for dinner situation that makes easy use of a multitude of CSA veggies..
Ivette's acelgas guisadas - a breakfast for dinner situation that makes easy use of a multitude of CSA veggies..
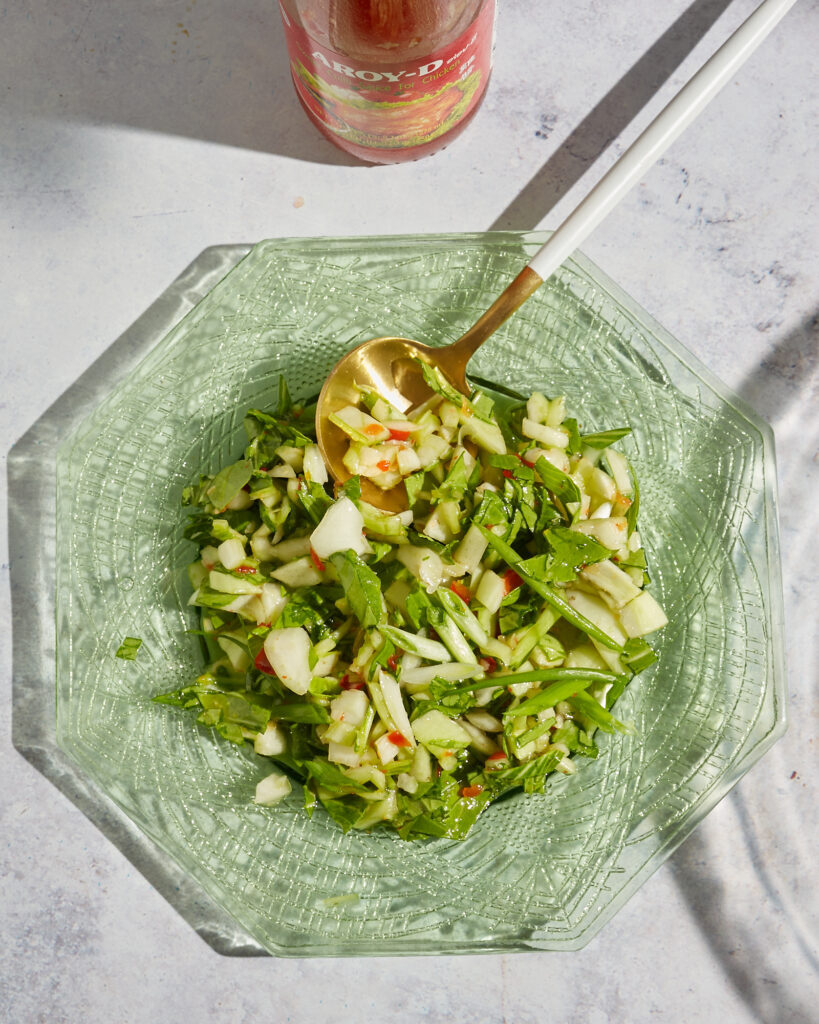 This bok choy salad by recipe developer Mackenzie s perfect as is. When the bok choy disappears from your box,, substitute it all together for cucumber or raw zucchini, and you have a more summery-version. When in doubt, make a raw salad with your CSA veggies. Recipe and photo by Mackenzie Smith Kelley.
If you are not used to getting produce delivered regularly it can feel a little overwhelming at first. It’s nothing like your TP subscription with Amazon. That stuff can pile up in your garage no problem. But the beautiful produce from your JBG Organic CSA membership is — gasp — perishable!
Panic sets in. What do I do with all these veggies? How do I store them? What will I cook with them?
Never fear. Follow me as I “unbox” my veggies and you will find tips to help you make the most of your CSA share.
1. Arm Yourself With Information
When I get my box, it’s like getting a new jigsaw puzzle. I open it right away and start sorting all the pieces. Depending on your puzzle personality you may start sorting by color, or straight edges. You start to build knowing you can look at the photo on the box if you get stuck.
Well, JBG has taken care to build a really helpful website. Visit their veggie guide page to get advice on how to store and prepare each vegetable. In fact, you can just keep this page open in your browser as you go through your box and look up what to do with each item as needed. Just like the cover of that puzzle box.
2. Take Inventory and Write Down Some Ideas
First, I take everything out and take inventory. Because I know the box is coming, I make sure not to overdo it at the supermarket in the days leading up to the delivery. It’s easy to plan for this if you are a CSA box-stalker like me, because you can find what is coming in your share with their handy seasonal chart, and the guide which shows you the box week by week.
Ok. Here we go, let’s open the box.
Ooohhh!!!! — clappy hands emoji — I am super excited to see baby bok choi! I grab a few of these bright orange carrots, run to the sink, and wash them. I munch on the super sweet carrots while I write down a list of ideas of what to make with my new toys… I mean, veggies.
Making a list of ideas on note paper that you can stick on your fridge with a magnet is a great first step. It not only helps you use up your veggies, but it also helps you menu plan your week ahead.
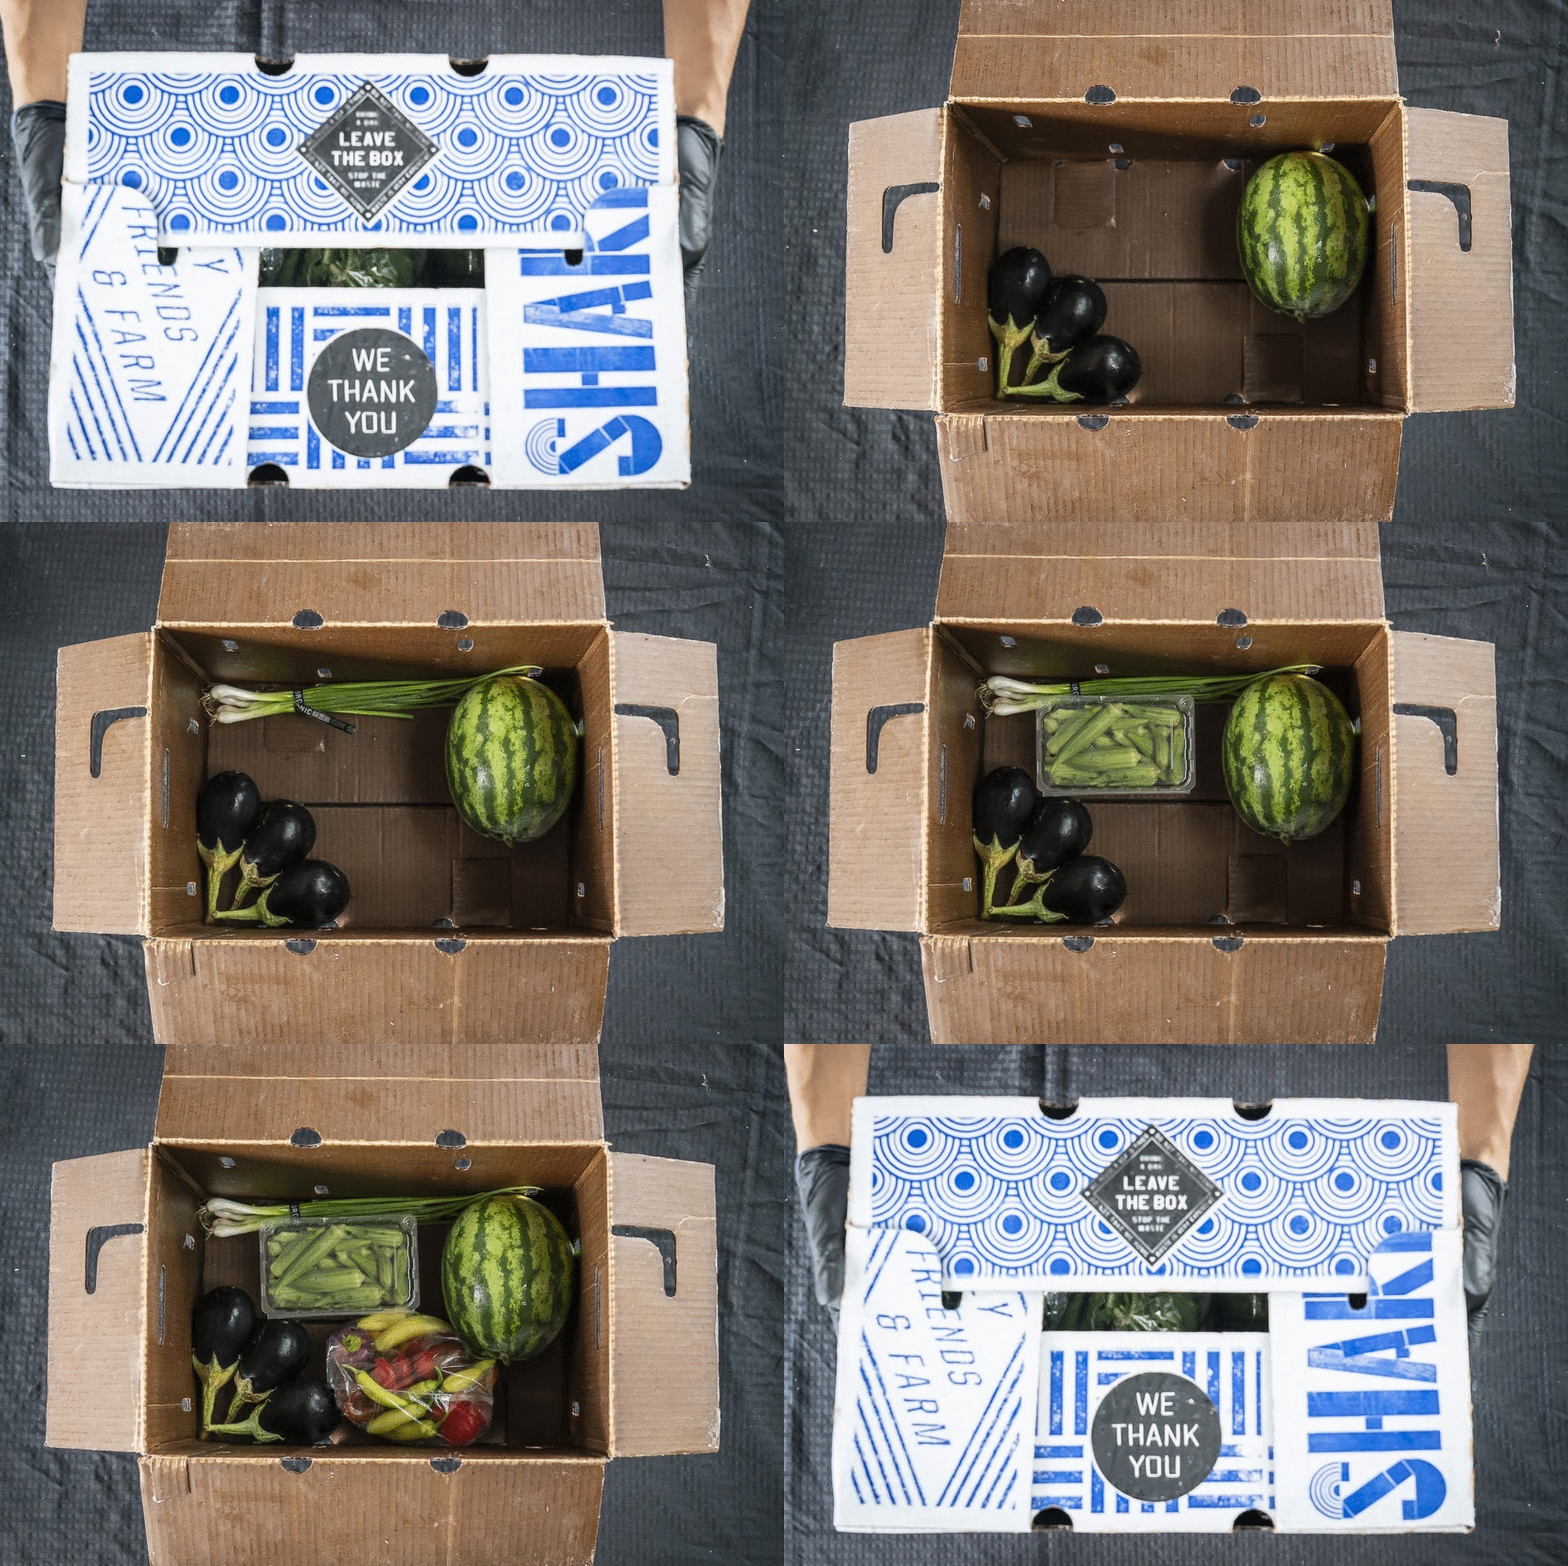 Take inventory. Which veggies do you know well? Which ones stump you? Protip: Simply google the vegetable that stumps you in addition to any other ingredients in your fridge that need using up. This is an easy way to get some recipe inspiration. For this box, for example, you might search "squash, peppers, eggs". Only google knows what recipe you might cook!
3. Let The Veggies Lead the Way
Let’s see what’s inside. Parsley and cilantro right away screams chimichurri to me. I could put chimichurri on anything. My recipe is similar to this one from JBG, with the addition of a teaspoon (or four) of finely minced capers. Also, I hand-chop. I like the texture better. Leafy herbs are super delicate so I know I want to wash those, trim the very bottom of the stems and put them in a jar of water. Mañana we chimichurri.
Red and green lettuce came in a bag that I toss in the fridge without looking. We eat lettuce every day. It’ll be gone before I know it. I could pickle the radishes but I love to slice and use those as confetti. So I just wash them. (And I remember to toss the green basket-y thing they came in to return with my box. Gotta reuse that!)
Sometimes leafy greens like kale and chard look like they need some TLC. Don’t worry, they’ve been traveling in a box in a truck. It’s like when you wake up at 4 am to catch a 6 am flight. By the time you land you need a little sprucing up too. A few minutes in a bowl with icy water and they perk right up.
The kale is pleading with me to make some “Caldo Gallego.” I tear it off the stems, put it in a zip bag that I flatten, and toss it in the freezer. No blanching required. Sometimes I freeze the stems to use in pesto, but today I’m feeling generous and toss them to my chickens. I could freeze the chard, but I think I am going to stew them into Acelgas Guisadas.
4. Don’t Beet Yourself Up
If you’ve been around for any length of time, you know there’s going to be some beets in that box, am I right? Those used to drive me crazy, but now unless I already have a specific plan for them, I just scrub them, toss them in my rice/slow cooker with enough water to cover by 1 inch, and set it for 2 hours (the shortest time on my machine). But it doesn’t take that long, especially if they are not very big, or you don’t have that many. Start checking them at 20 minutes. You get the same result using a saucepan and water on your stove. No fancy required.
When they are tender I let them cool, peel them and store them in a container in the fridge. Now that they are cooked I know I can grab, chop and toss into a dish whenever I feel like it. The JBG website has lots of ideas of what to make with beets in your CSA share.
I know what you’re thinking, “Oh, but beets are so delicious when roasted, or steamed or…” Yes, there are so many “better” ways to prepare them. But I find that if I overthink it I just don’t use them.
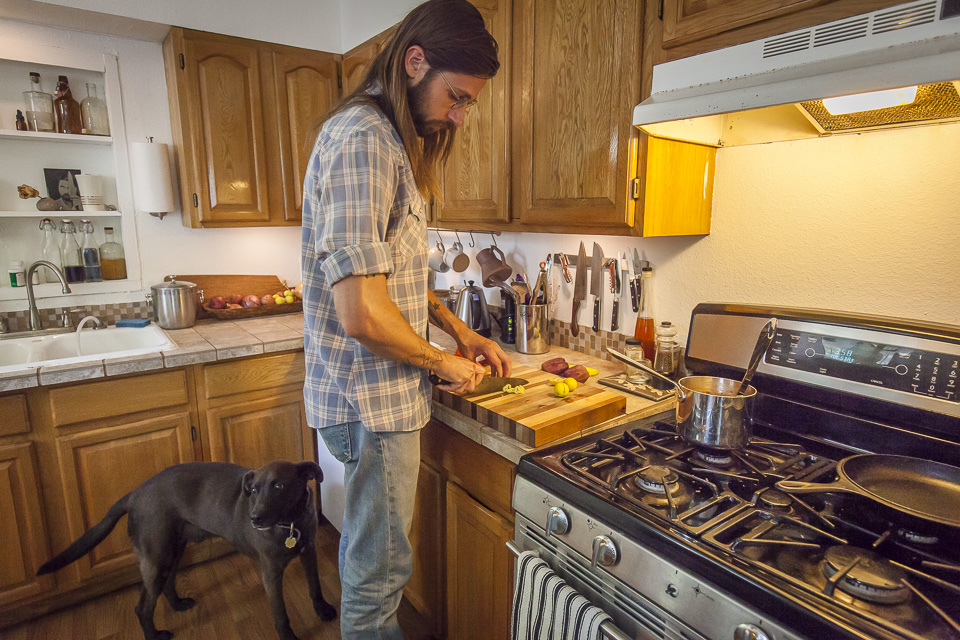 Chef and CSA Member Taylor Chambers knows a thing or two about steaming beets. We love his no-frills advice for making use of your beets that he shared in a spotlight so many years ago. Click the photo to read the full story.
5. Cook Something TODAY!
Don’t wait to use the items in your share box. Pick something and use it today.
When I was through sorting my veggies, it was time to start dinner. We had some leftover homemade shrimp fried rice in the fridge, so I prepped some carrots, along with the baby bok choi, and threw together a quick veggie stir fry to serve with the rice. Topped it with my ‘radish confetti’. About 15 minutes later... “Dinner is ready!” A fresh, healthy meal made with local organic produce. It’s that simple. And I love it.
How do YOU make the most of your CSA share? I would love to know. Want the recipe for Caldo Gallego? Let me know in the comments below.
 Ivette's acelgas guisadas - a breakfast for dinner situation that makes easy use of a multitude of CSA veggies..
CREAMY LEEK AND MUSHROOM PASTA
06/10/21 — Ada Broussard
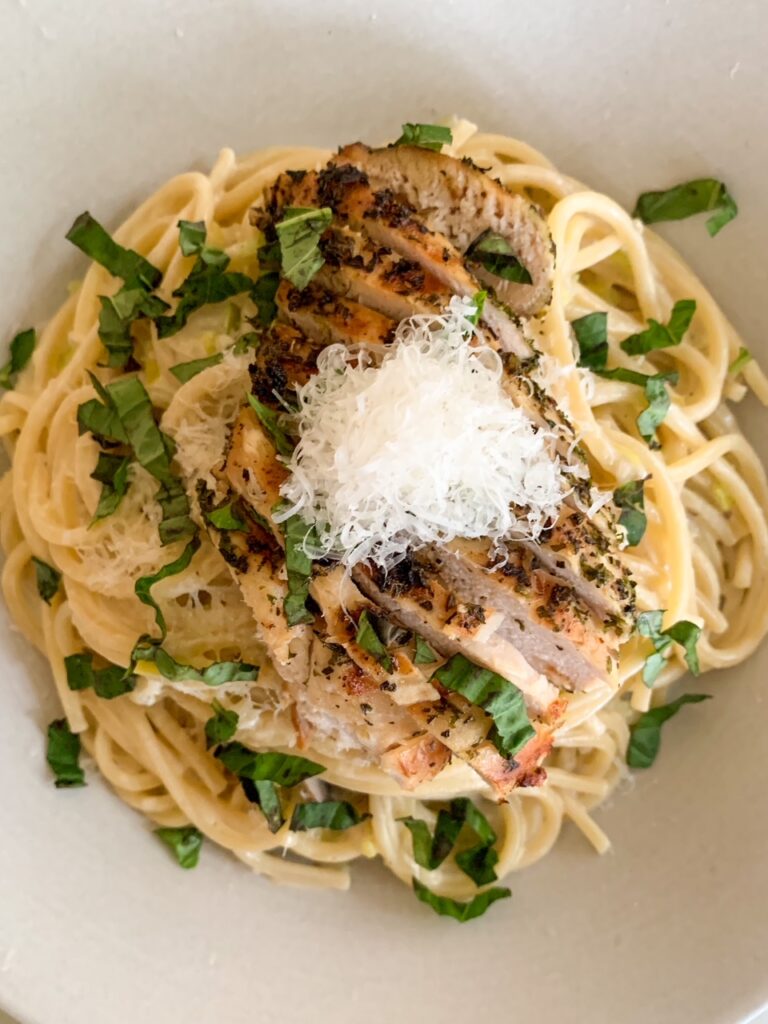 Photo and recipe by The Migoni Kitchen.
Author: The Migoni Kitchen Servings: 2
Leeks are one of our favorite JBG veggies - they are super versatile. We love a good potato leek soup, but also use these in quiches or frittatas, eat the simply grilled or sauteed, or diced up into a pasta dish like this one!
We typically like to have a quick weeknight pasta dish in our weekly rotation and this fits in perfectly. You can always customize it to your liking. Feel free to omit the chicken if you prefer a vegetarian option and increase the amount of mushrooms. You can really use any pasta you like. Top it off with your preferred fresh herbs - we got some basil in our box this week so we opted for that. Easy tasty dinner!
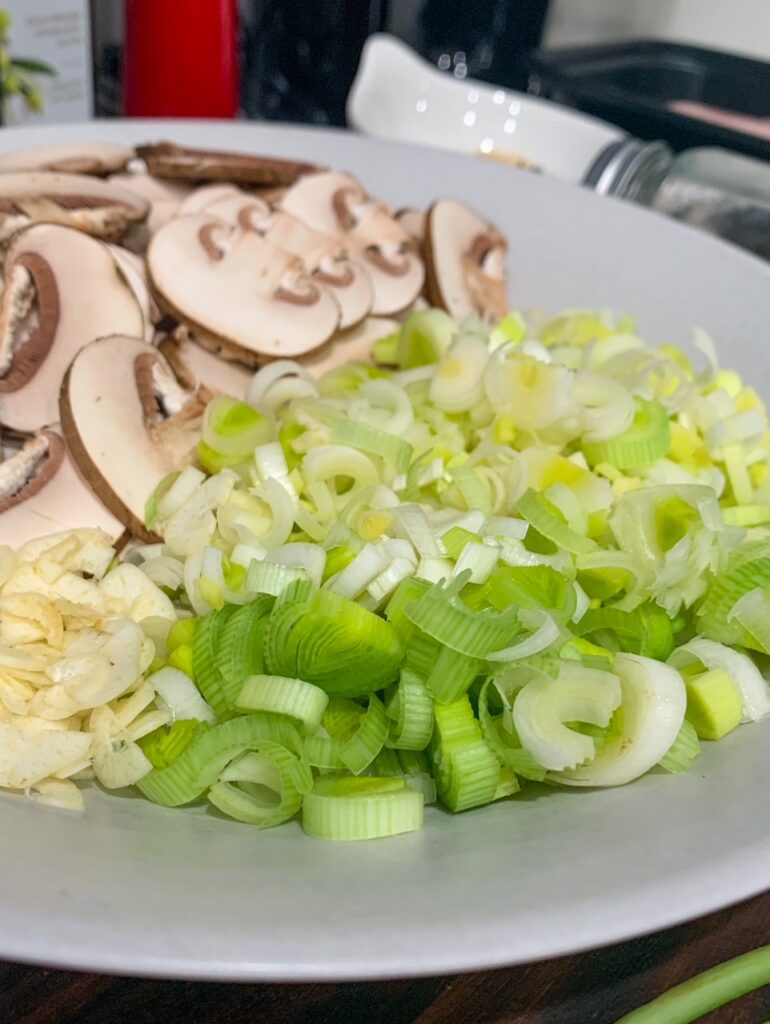
Ingredients:
- 3 tbsp EVOO
- 2 Leeks - Thinly sliced
- 2 cloves Garlic - Thinly sliced
- 2 cups Baby bella or button mushrooms - sliced
- 1 cup Heavy Cream
- ½ tsp White Pepper
- 8 oz. Spaghetti
- 2 Chicken Breasts
- 1 tbsp dried parsley
- 1 tsp dried basil
- ½ tsp dried oregano
- ½ tsp garlic powder
- ½ tsp black pepper
- 1.5 tbsp kosher salt
- Fresh basil or parsley
- Parmesan Cheese
Instructions:
- In a small bowl, combine the dried basil, dried oregano, garlic powder, black pepper, and 1 tbsp of kosher salt.
- Rub the chicken breast with 1 tbsp of EVOO then coat the chicken breast generously with herb mix.
- Grill the chicken breast until fully cooked then place in the oven to keep warm.
- Heat a large pot of salted water.
- While you wait for the water to boil, in a large pan heat the remaining 2 tablespoons of EVOO.
- Add the garlic and leeks and cook for 1 minute, then add the mushrooms and continue cooking for another 5 minutes - stir frequently.
- Add the cream, white pepper, and ½ tbsp kosher salt to cooked vegetables. Reduce heat and allow sauce to simmer and reduce until you finish cooking the pasta.
- While the sauce is simmering, cook the pasta 2 minutes less than the package recommendation so that the pasta is still a bit crunchy.
- Remove the cooked pasta and 1 cup of pasta water and add it to the sauce. Increase heat and stir vigorously until the sauce thickens and evenly coats the pasta (about 4-5 minutes).
- Plate pasta in a large bowl, topped with the sliced chicken, parmesan, and fresh herbs.
CSA BOX CONTENTS WEEK OF JUNE 7TH
06/04/21 — Farm
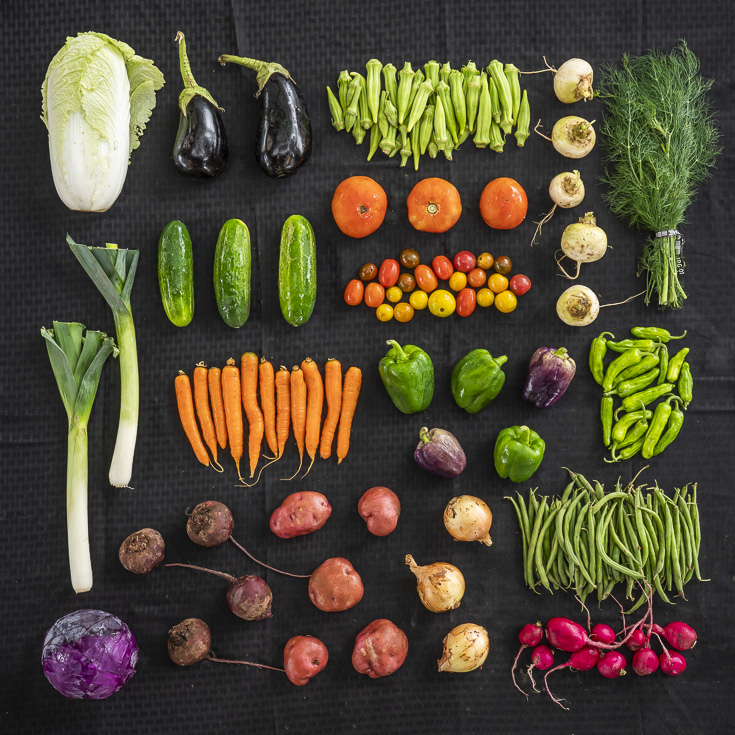 CSA Box Contents Week of Jun 7th
Individual: Potato, Carrot, Cucumber, Sweet Pepper, Tomato
Small: Potato, White Japanese Turnip, Cucumber, Sweet Pepper, Tomato, Onion, Leeks
Medium: Potato, Cucumber, Sweet Pepper, Tomato, Harvest Highlight, Beet, Herb, Radish, Farmer's Choic Green, White Japanese Turnip
Large: Potato, Carrot, Cucumber, Sweet Pepper, Tomato, Harvest Highlight, Cabbage, Leek, Onion, Beet, Herb, Farmer's Choice Green
PHOTOS FROM THE FARM: 6.4.21
06/04/21 — Ada Broussard
In case you missed the announcement, Scott David Gordon, the farm photographer for the past 11 years (!!!) is leaving Texas. If you're a fan of SDG's photos, we encourage you to checkout his podcast, Austin Art Talk. The photos below will likely be his second to last time visiting the farm in a formal photography capacity, and we're so grateful that the flowers were there to greet him. There was plenty of mud, too. Wanna pick some flowers yourself? Our flower u-pick begins tomorrow at our Saturday Farmstand. Details here.
![]() Scott sure knows how to take a box photo. Though photos like this of a farm's harvest are now pretty common... Scott really pioneered this style of photo for JBG some 11 or 12 years ago.
Scott sure knows how to take a box photo. Though photos like this of a farm's harvest are now pretty common... Scott really pioneered this style of photo for JBG some 11 or 12 years ago.
![]() Jack giving some training to Jamie Lee, showing her 1 of our billion spreadsheets that make the farm go, go, go. Photo by Scott David Gordon.
Jack giving some training to Jamie Lee, showing her 1 of our billion spreadsheets that make the farm go, go, go. Photo by Scott David Gordon.
![]() Burgeoning okra, from above. Photo by Scott David Gordon.
Burgeoning okra, from above. Photo by Scott David Gordon.
![]() Rain kissed green tomatoes, with a few blushing reds hidden deep. Photo by Scott David Gordon.
Rain kissed green tomatoes, with a few blushing reds hidden deep. Photo by Scott David Gordon.
![]() Now isn't that a sight. We're waiting on warmer temps and sunnier days to turn all of these green tomatoes RED! Photo by Scott David Gordon.
Now isn't that a sight. We're waiting on warmer temps and sunnier days to turn all of these green tomatoes RED! Photo by Scott David Gordon.
![]() Fried green tomatoes, anyone? Photo by Scott David Gordon.
Fried green tomatoes, anyone? Photo by Scott David Gordon.
![]() Behold, the flowers! We planted zinnas and sunflowers along our entrance road. It's unclear who will delight in them more: customers, or our staff who have a cheery welcome to work everyday. Photo by Scott David Gordon.
Behold, the flowers! We planted zinnas and sunflowers along our entrance road. It's unclear who will delight in them more: customers, or our staff who have a cheery welcome to work everyday. Photo by Scott David Gordon.
![]() Zinnias are in bloom! Sunflowers are beginning their debut! Come to the Farmstand and help us pick these! Photo by Scott David Gordon.
Zinnias are in bloom! Sunflowers are beginning their debut! Come to the Farmstand and help us pick these! Photo by Scott David Gordon.
![]() This is a color pallet we can get behind. Bright and vibrant, just like the summer ahead. Photo by Scott David Gordon.
This is a color pallet we can get behind. Bright and vibrant, just like the summer ahead. Photo by Scott David Gordon.
![]() The first blooms are always the prettiest. Photo by Scott David Gordon.
The first blooms are always the prettiest. Photo by Scott David Gordon.
![]() Pollinators, rejoice! Photo by Scott David Gordon.
Pollinators, rejoice! Photo by Scott David Gordon.
![]() Sunflowers, but furry. Photo by Scott David Gordon.
Sunflowers, but furry. Photo by Scott David Gordon.
![]() A black hole of a sunflower. Photo by Scott David Gordon.
A black hole of a sunflower. Photo by Scott David Gordon.
![]() A mesmerizing shot, just before boom. Photo by Scott David Gordon.
A mesmerizing shot, just before boom. Photo by Scott David Gordon.
![]() Oh, hello! Photo by Scott David Gordon.
Oh, hello! Photo by Scott David Gordon.
![]() We promise we grow more than flowers... broccoli and cauliflower, too. Photo by Scott David Gordon.
We promise we grow more than flowers... broccoli and cauliflower, too. Photo by Scott David Gordon.
![]() The theme of the week? Mud. Photo by Scott David Gordon.
The theme of the week? Mud. Photo by Scott David Gordon.
![]() Spring cabbage looking beautiful. Photo by Scott David Gordon.
Spring cabbage looking beautiful. Photo by Scott David Gordon.
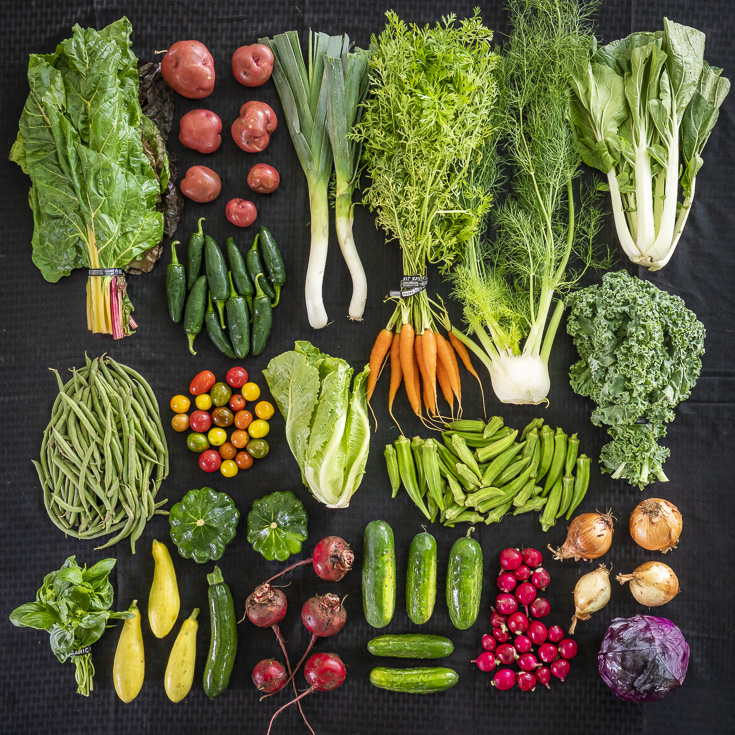 Scott sure knows how to take a box photo. Though photos like this of a farm's harvest are now pretty common... Scott really pioneered this style of photo for JBG some 11 or 12 years ago.
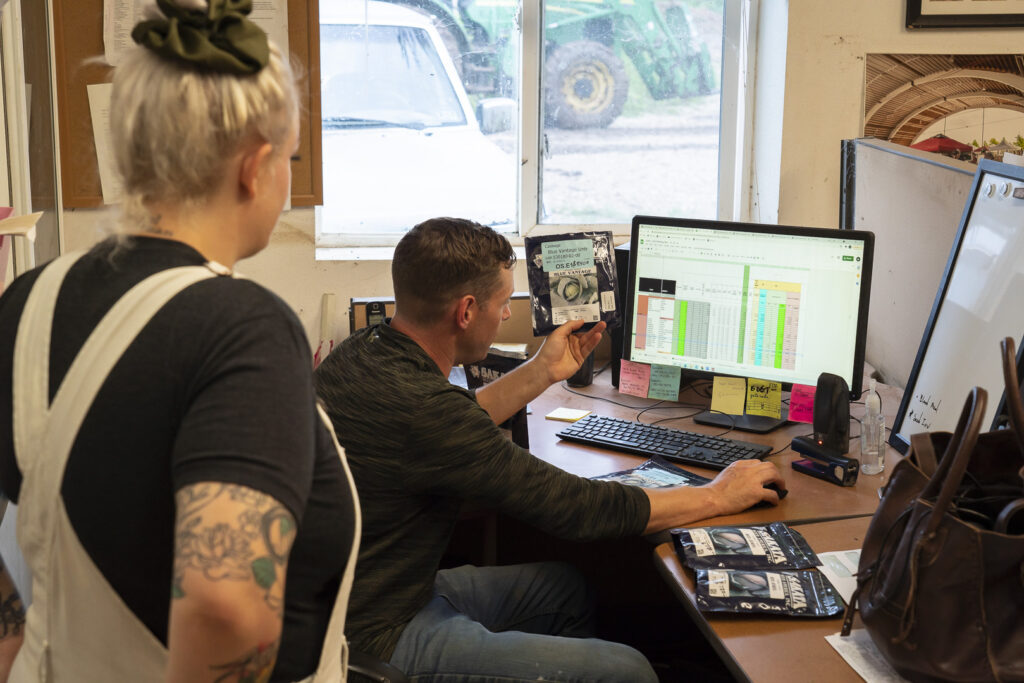 Jack giving some training to Jamie Lee, showing her 1 of our billion spreadsheets that make the farm go, go, go. Photo by Scott David Gordon.
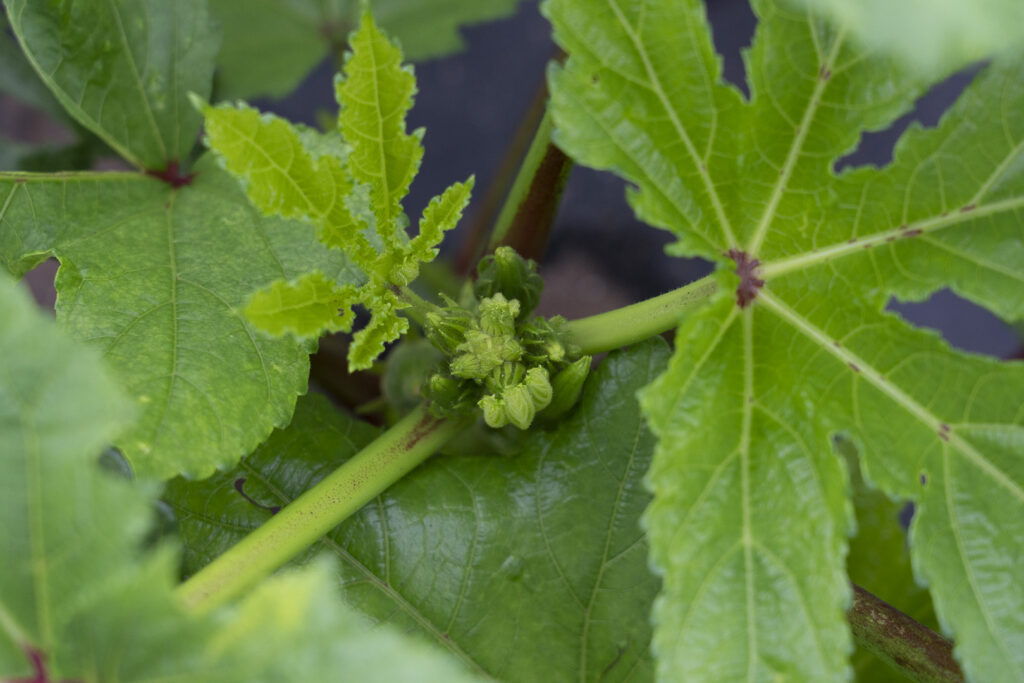 Burgeoning okra, from above. Photo by Scott David Gordon.
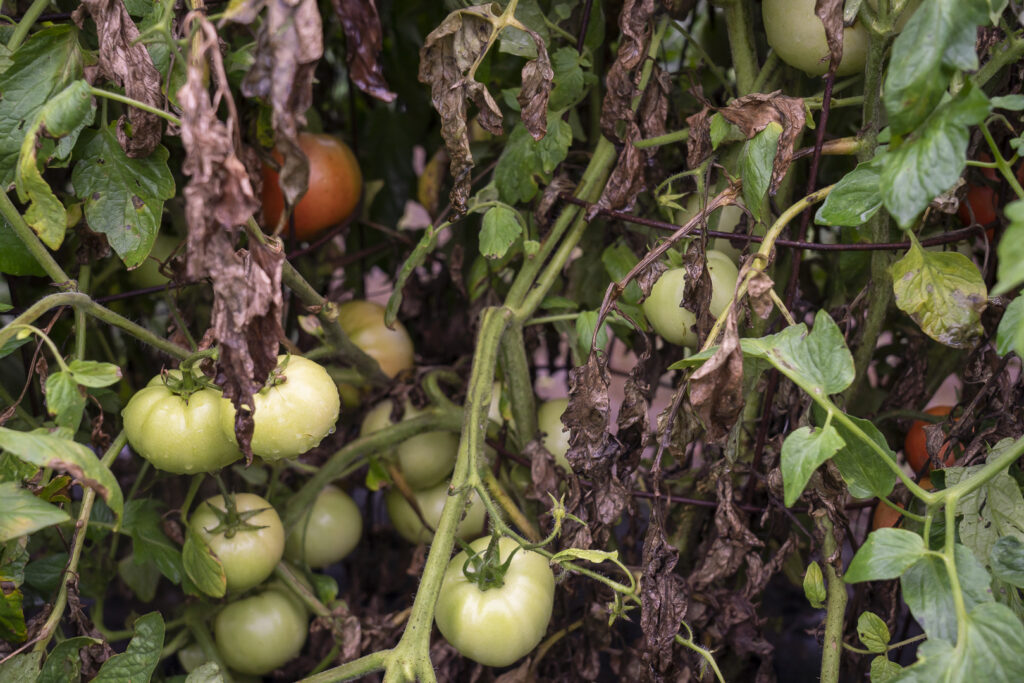 Rain kissed green tomatoes, with a few blushing reds hidden deep. Photo by Scott David Gordon.
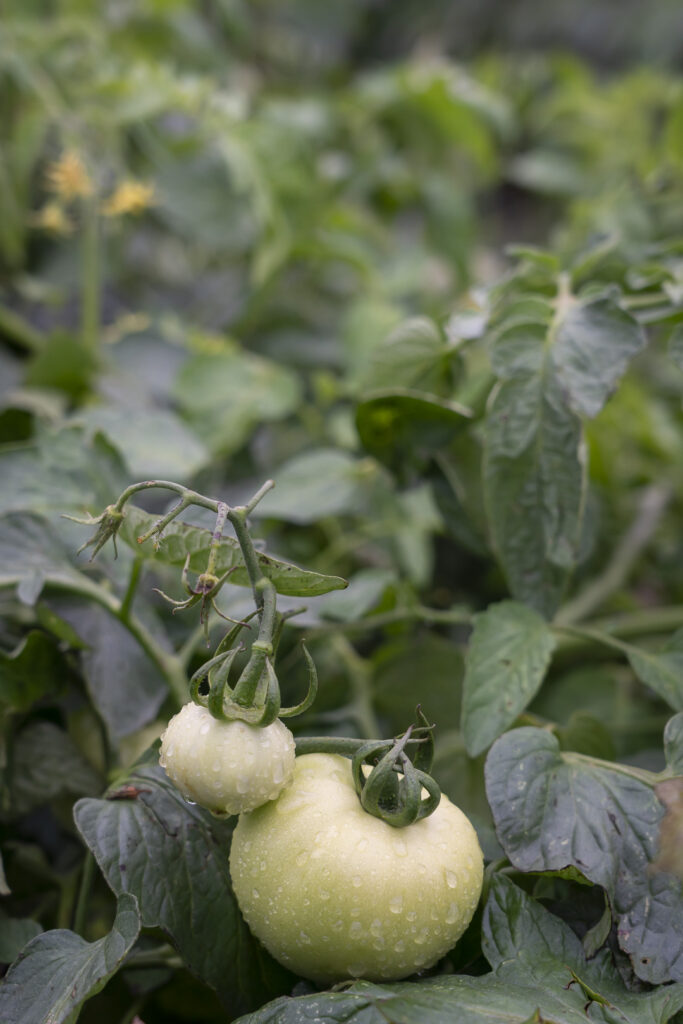 Now isn't that a sight. We're waiting on warmer temps and sunnier days to turn all of these green tomatoes RED! Photo by Scott David Gordon.
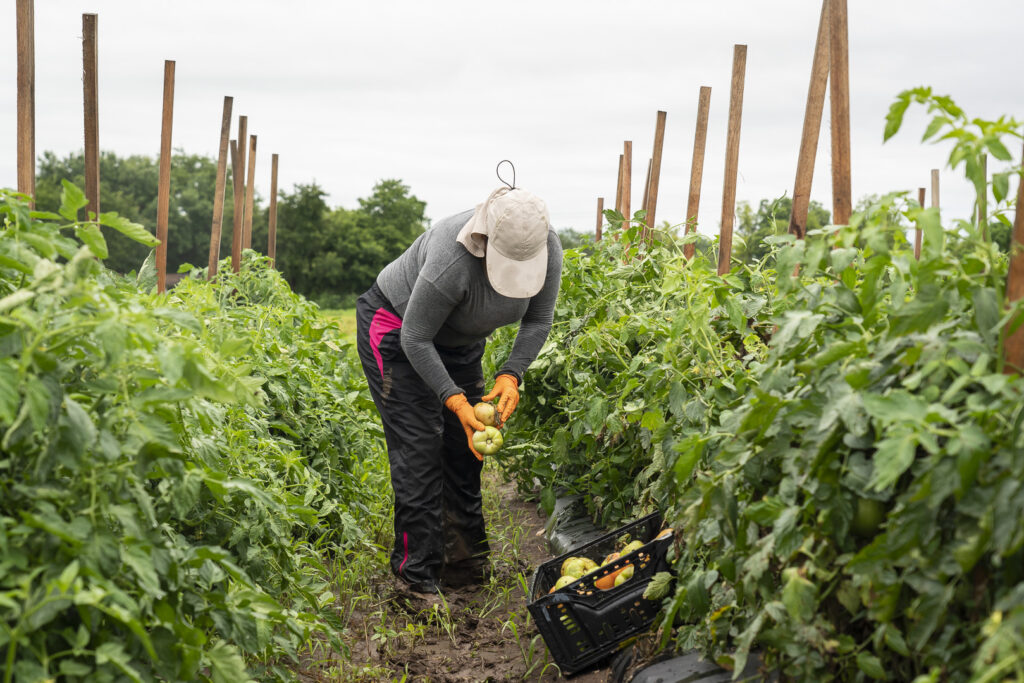 Fried green tomatoes, anyone? Photo by Scott David Gordon.
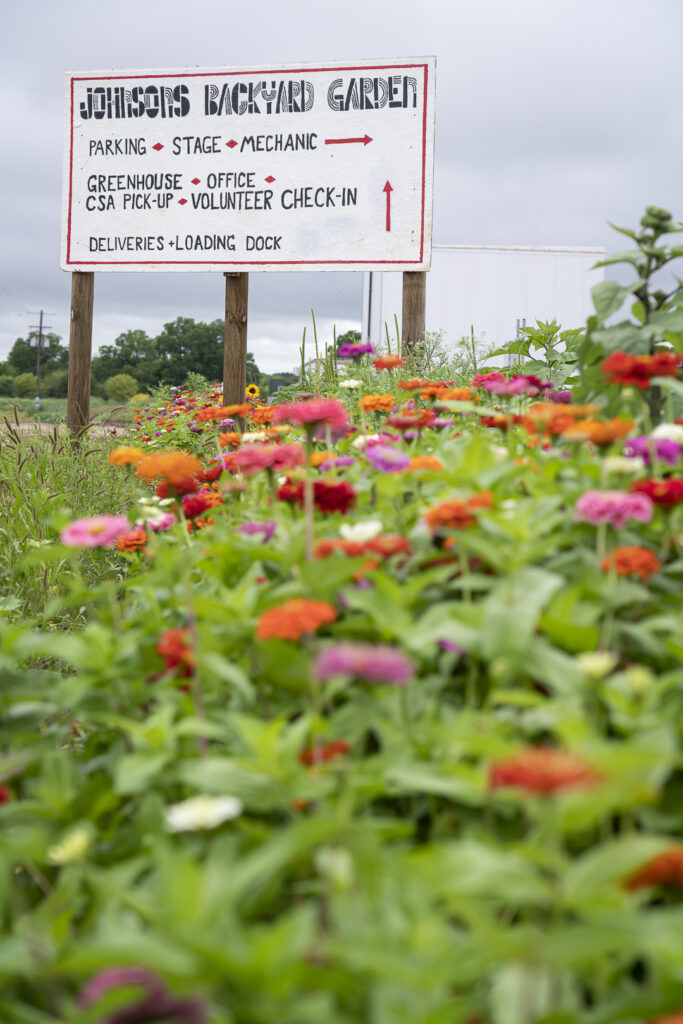 Behold, the flowers! We planted zinnas and sunflowers along our entrance road. It's unclear who will delight in them more: customers, or our staff who have a cheery welcome to work everyday. Photo by Scott David Gordon.
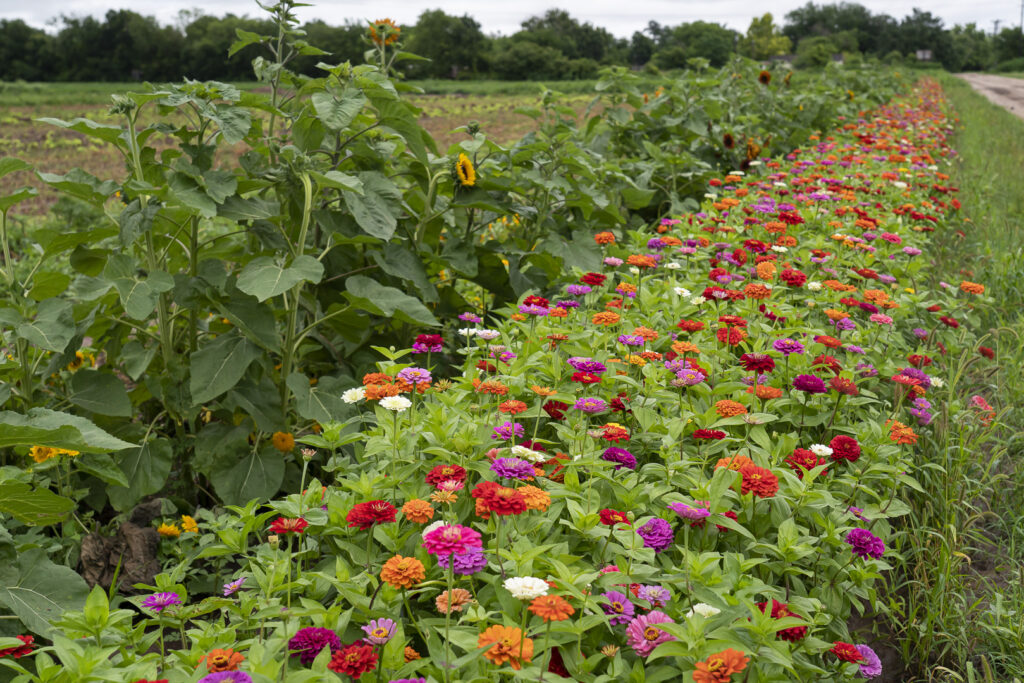 Zinnias are in bloom! Sunflowers are beginning their debut! Come to the Farmstand and help us pick these! Photo by Scott David Gordon.
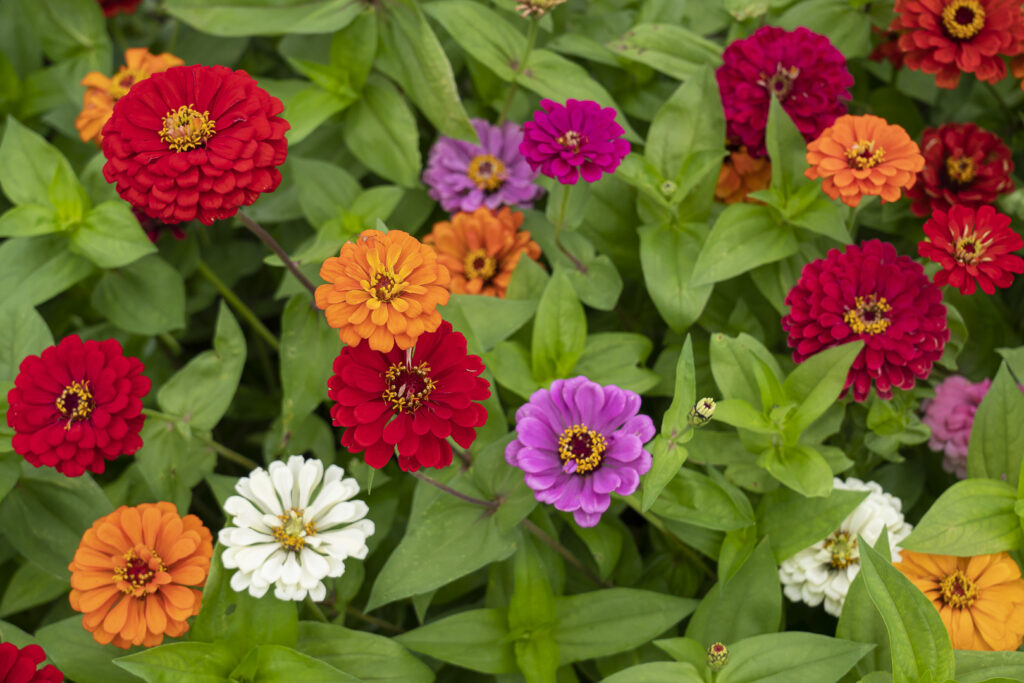 This is a color pallet we can get behind. Bright and vibrant, just like the summer ahead. Photo by Scott David Gordon.
 The first blooms are always the prettiest. Photo by Scott David Gordon.
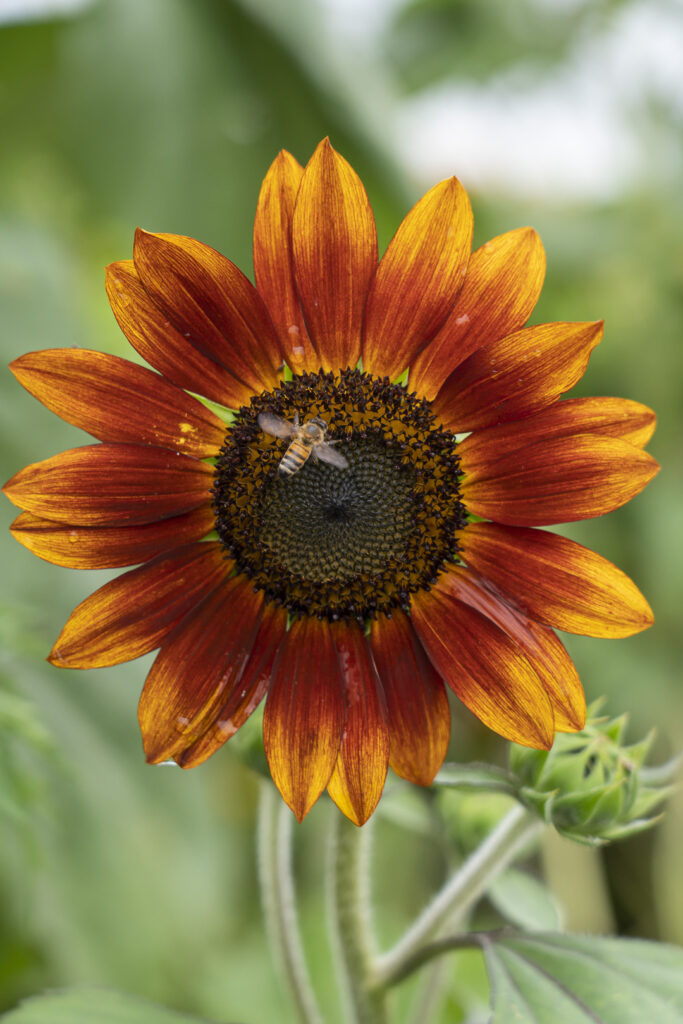 Pollinators, rejoice! Photo by Scott David Gordon.
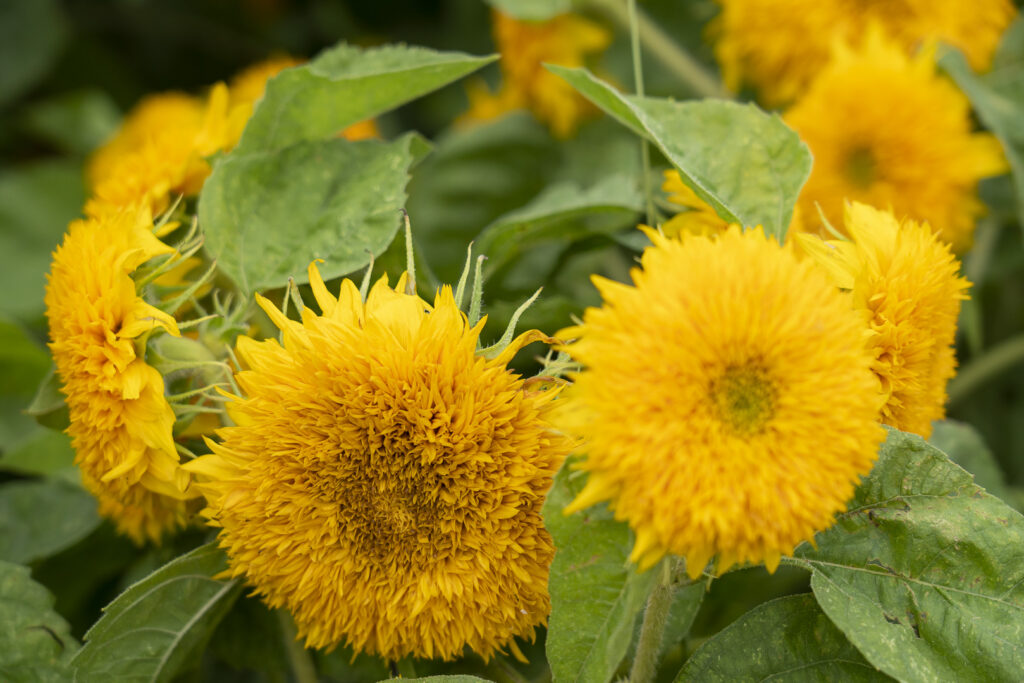 Sunflowers, but furry. Photo by Scott David Gordon.
 A black hole of a sunflower. Photo by Scott David Gordon.
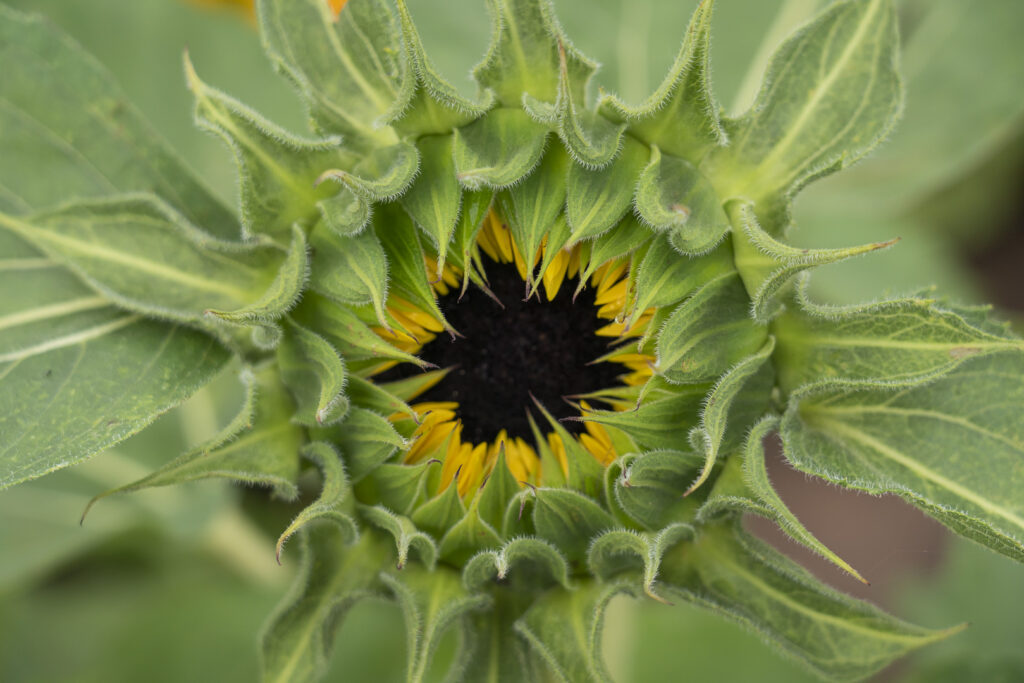 A mesmerizing shot, just before boom. Photo by Scott David Gordon.
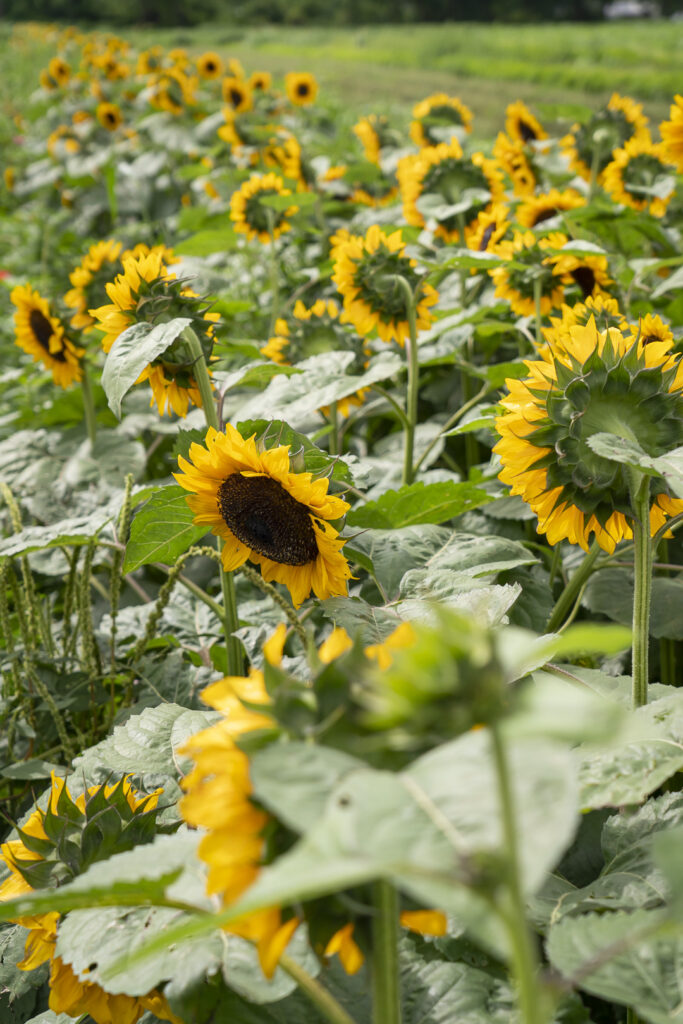 Oh, hello! Photo by Scott David Gordon.
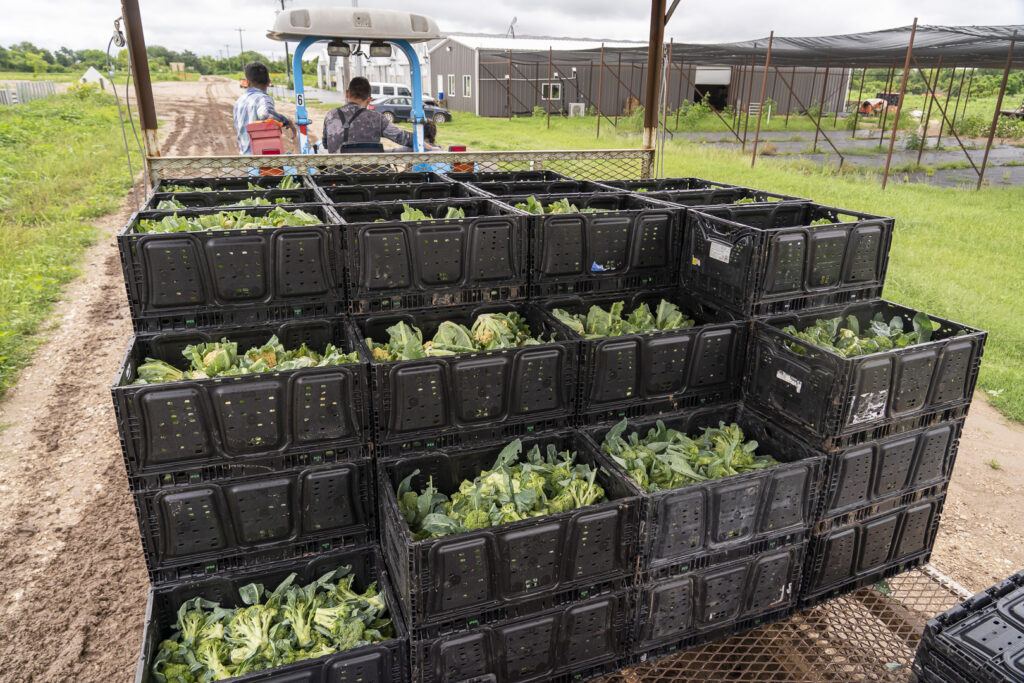 We promise we grow more than flowers... broccoli and cauliflower, too. Photo by Scott David Gordon.
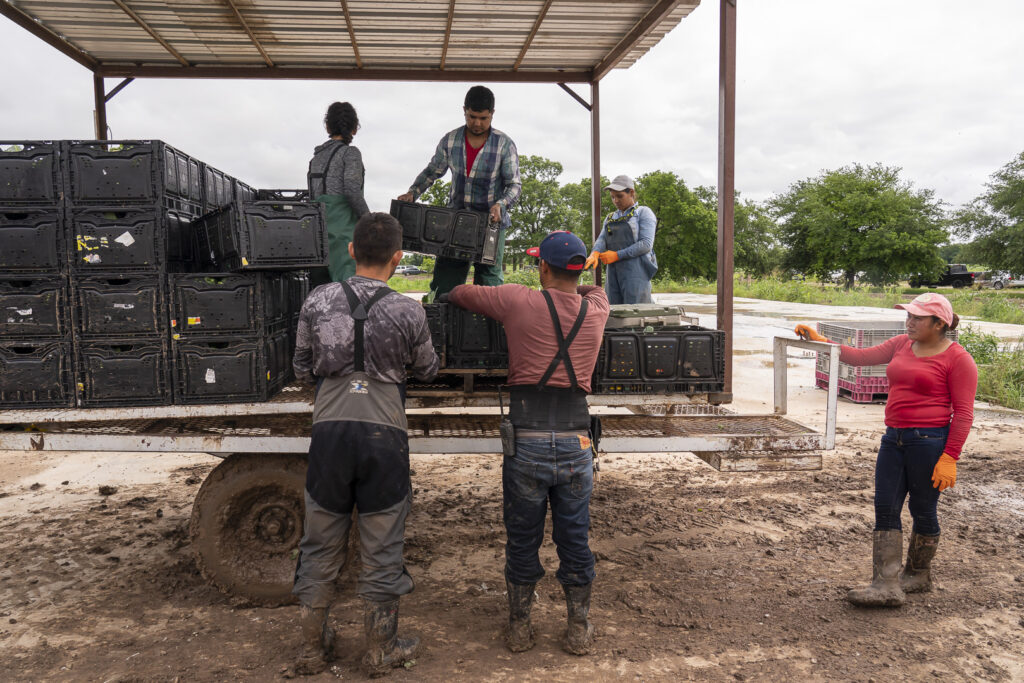 The theme of the week? Mud. Photo by Scott David Gordon.
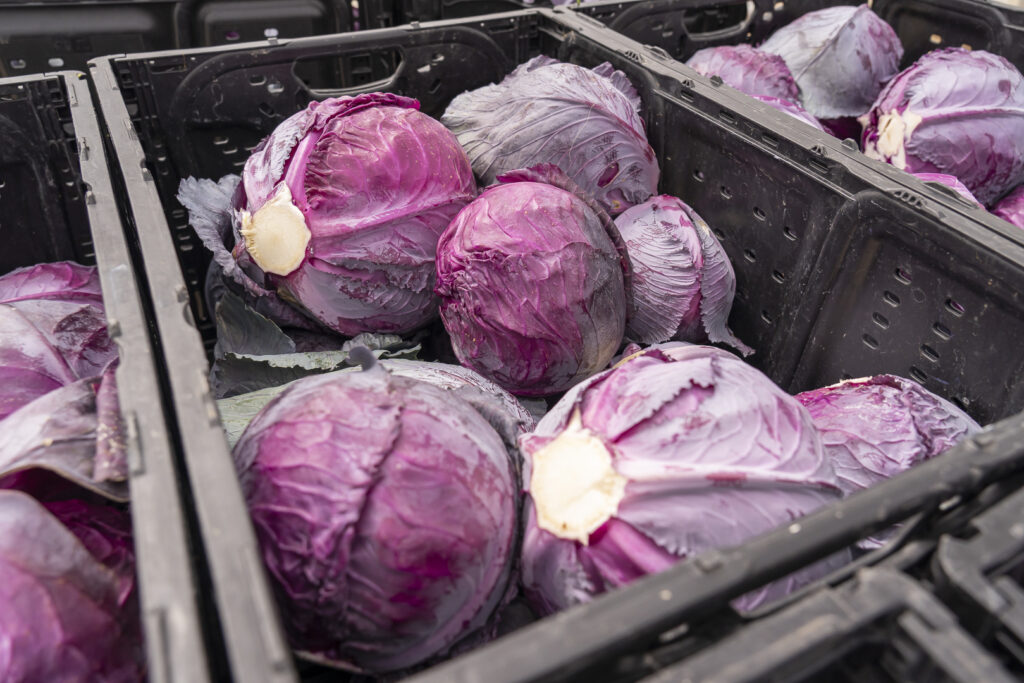 Spring cabbage looking beautiful. Photo by Scott David Gordon.
THE SOPPY TRUTH ABOUT ALL THIS RAIN
06/04/21 — Ada Broussard
 We're feeling very saturated over here.
Hello blog readers and CSA Members!
Before we jump in, we have a special note about this Saturday’s farmstand. We have flowers!!! Pick your own bouquet, or snag one at the Garfield Farmstand that we’ve already harvested. CSA Members: As promised, you can pick a bouquet for free! And if you’re not a member, bunches of zinnias or sunflowers are only $5. Also! If you visit our Garfield Farmstand this Saturday, we’re running a special deal: for every $5 you spend, you get 1 free transplant. Transplant deal for this weekend only.
No onto business. This week on the blog, we wanted to take a moment and talk about the recent weather, and how it affects the farm, generally, and the CSA, specifically.
If you’re a CSA Member, you may have noticed some inconsistencies over the past couple of weeks between the box contents listed on our website and the box contents in your actual box. (Members, how has this affected you? Let us know by taking this survey here.) CSA Member or not, you may have also noticed things have been pretty wet as of late. The two instances are intimately connected.
Let us back up and start by explaining how we choose the CSA box contents each week. At the risk of sounding like overly dramatic farmers, we can’t emphasize enough how much consideration we put into this process. The job of planning one week’s box contents truthfully begins about 9 months before the box is ever packed when we decide on what varieties of seeds we’d like to purchase. These decisions are a team-effort and are based on years of historical data, customers’ feedback, the specific advantages and limitations of our croppable land, as well as a healthy sprinkling of farmer intuition. This process gives us the general blueprint of what vegetables we *hope* to grow, during which months. That’s step one.
 Choosing CSA box contents is a task we take very seriously. Watermelon and eggplant coming soon to a share near you.
The next major step in CSA box-content planning happens about a month before the box’s pack date. This content mapping is based on which crops are currently growing, their health, and any logistical considerations - is the root harvester broken? Do we have enough labor to tackle a tedious crop like green beans? Are the pests minding their own business?
When it comes time to settle on the final version of a particular week’s box contents, Andrew, our CSA Packing Manager, consults with Tracy, our Barn Manager. The two make a plan, making sure that one week’s contents isn’t too similar to the week before, with a conscious effort to include a combination of crops that feel different from each other and that check different boxes like “a potato! Everyone knows what to do with me!” and “whoa! Look at this alien-like kohlrabi bulb!”. Andrew and Tracy take into consideration the needs of other departments, how things will fit together in a box, and check with A to see if people are craving something specific.
You may be wondering, though, how exactly they know what vegetables to include in the box? It’s not usually straightforward. On one hand, telling you what exactly will be in the boxes is one of the riskiest things we can do at the farm because (honest little secret) so much of it is based on a wish and a prayer. When Tracy visits the farm each week and scouts the fields, he makes note of all the fruit that look like it will be ready for harvest the following week. Unlike a grocery store, we do not have a ready-to-go inventory of endless vegetables. We harvest crops fresh for the CSA, and so much of our “inventory” lives in the field where it’s subject to… everything.
Most of the time, we can look at a row of zucchini at the end of one week, see that it’s covered in flowers, and make an educated guess as to how many pounds of zucchini we can harvest per row. So much of our box planning is based off of projections of how a crop will mature and look at the time we need to harvest it, which is just before it gets put into your box.
As you might imagine, these ‘best-guesses’ are subject to change. These past few weeks, with the incessant rain, the muddy conditions, and the inability to get equipment in the fields… even our most meticulously laid plans seem pointless. The weather has made itself known, and we bend and adapt our plans because this is farming, after all. Isn’t it exciting?!
 Rain boots - sponsor us.
It seems like the rain has been nonstop for the past 4 weeks. We feel saturated. Here are a few of the ways the weather affects our farm:
Vegetables: Dark and gloomy days slow down the ripening and maturation of many of our crops. Vegetables need sun to grow, and consistently cloudy days can really pump the brakes. Most of our summer vegetables need 6-8 hours of sunlight a day in order to initiate the flowering process. Consistent temps of about 80 degrees speeds this process along, too. When the sun doesn’t poke out for days on end, and for only a few hours at a time, the fruiting process is stymied. This is what is happening with several of our crops! The foliage is big and beautiful, but the flowers, few.
Labor: The farm is muddy, and everything takes longer in the rain and mud. The simple task of walking from the harvest trailer to the end of the row is made more difficult by the ankle-weights of mud tethered to your feet. Now imagine doing that carrying a 45 pound bin of vegetables… If you can’t get the trailer to you, you have to go to the trailer. Earlier this week, strong gusts of wind blew over nearly every one of our tomato cages! Falling rain splashes dirt up onto crops like greens, rendering them a chore to clean. Instead of spraying off light, crumbly dirt from carrots, we’re washing roots that have a thick layer of mud caked on them. Even deliveries take longer, and despite the best crew, and the best time management, some harvests just can’t get done when we planned because everything is taking too long. During days like this, we’re often faced with a tricky dilemma: divert our planting crew to harvest duty and make sure that we fulfill the current veggie demands? Of course, if we choose this route, we are also shooting ourselves in the foot for future availability later this summer. If things don’t get planted, they won’t turn into crops.
 Our farm is divided into grids and there are several permanent roads, like this one. During wet conditions, they endure a lot of impact and it takes a true nija... or a very powerful tractor... to navigate them. Even the best operators can still get stuck.
Equipment: When our fields are wet, we cannot work them with tractors. Not only would our tillage equipment not perform under these conditions, but also, when you put heavy machinery on wet soil, you run the risk of compacting the ground, rendering our lovely loose dirt into a dense dilemma. Trucks can sink in an unexpectedly muddy area, and everything has to come to a halt to unstuck the stuck. Because we can’t navigate through the farm with tractors and harvest trailers in the same way that we can under dry conditions, we are incredibly behind on planting schedules, for example. It’s noteworthy that after heavy rain like this, we need at least 3-4 very sunny days to dry things out and make our equipment useful again. In other words, it’s not just the rainy days that slow things down, it’s the wet conditions that follow too.
 The Landini loaded with mud. In conditions like this, we pressure wash the tractors at the end of every day.
 The mud can feel inescapable.
Pests: In soppy conditions like this when we have trouble getting into the fields, some crops rot on the vine before we can pick them. We’re looking at you, zucchini. This is a breeding ground for pests, who are happy with the miserable conditions and do their best to procreate amid our problems. As soon as the sun peeks out and new fruit is ready, unfortunately a new generation of pests will also be ready to picnic away.
Sharing your projected box contents is important to us. We know that having a general idea of your CSA contents is useful to plan meals and grocery shop. Most of the time, we’re able to hit that mark, fairly accurately. Right now? In the Central Texas monsoon season? We’re doing our best. Please know that when we decide to put something in your CSA share other than what we said we would, it is a difficult decision, impacted by many circumstances. And while we know many of you are understanding of our predicament, we do look forward to sunny and predictable days when we can deliver on exactly what we say we will. That’s how it’s supposed to be, and you’re right to expect that from us… most of the time. The other times? Just remember that we are a farm, and the plants we’re trying to grow are sitting out there in a field… vulnerable to weather events.
Cheers to sunnier days ahead. Thanks for your patience. Tomatoes are coming!
Love, Your appreciative farmers
P.s. CSA Members (and lapsed members) - here is a link to the survey we’re asking you to take. We’ll raffle off some merch to all members who take the survey! Thanks for your help!
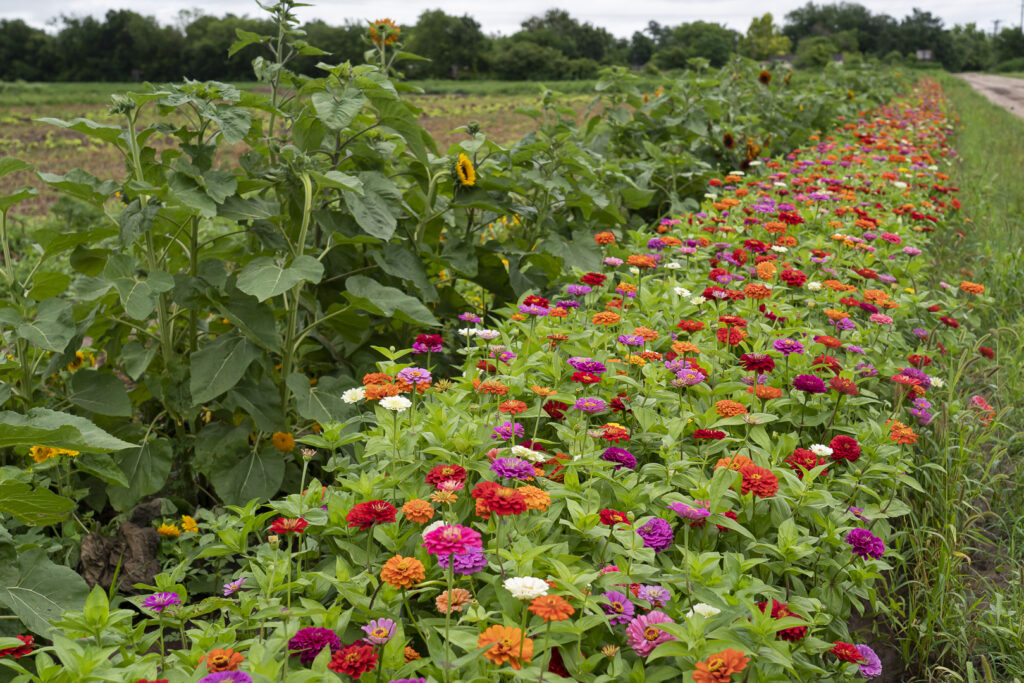 All the soppy mud aside, there are flowers!!!!
ADA'S BLISTERED GREEN BEANS
06/03/21 — Ada Broussard
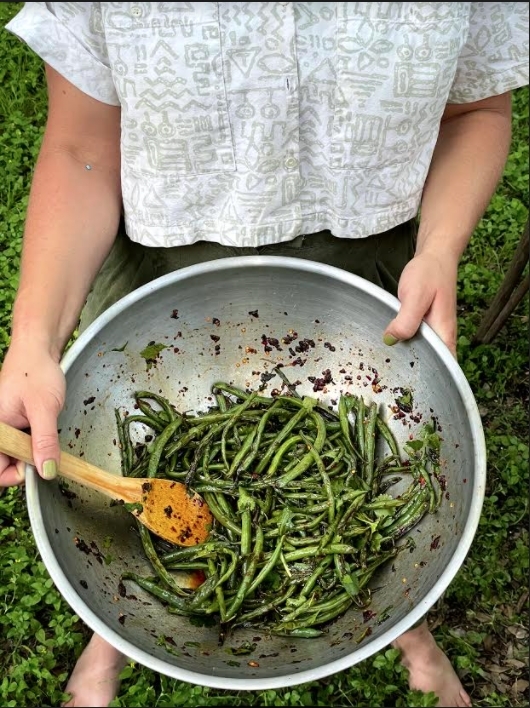 By Heydon
I have always loved this recipe. When I was first getting to know Ada, she popped by with this “thrown-together” (please note: her “thrown-together” usually translates to beautifully impressive and delicious beyond belief) and epically delightful dish. It was perfectly spicy, crispy, fresh - everything was just right. It’s a banger of a side dish, and likely will steal the show at any dinner. I haven’t been able to rid my mind of it since that day years ago, and luckily this weekend she made my dreams come true by recreating it and allowing me to document the process. It’s so exciting and life-giving to be with friends again - cooking, sharing a table, and enjoying each other’s company.
Green beans have a quick season - so, this recipe is an awesome way to enjoy these special, early-summer gems. We know green beans are great stir-fried in a hot wok, but an easier route is to throw them in a broiler as you’ll see below. Ada tells me the not-so-secret, secret ingredient is the Chili Crisp - a Chinese condiment featuring onions, peppercorns, chili, and garlic fried in oil. Chili crisp is wonderful to keep in the fridge - it’s packed with spicy flavor and the most perfect crispy crunchies. Ada's jar came from MT Supermarket in Central North Austin.
Ingredients:
- A bag of JBG green beans
- Peanut oil (or another neutral oil)
- White wine vinegar (or another acid)
- Spicy chili crisp (we used Laoganma Spicy Chili Crisp)
- Salt
- Sugar (or another sweet substitute)
- Cilantro (or another fresh herb you enjoy)
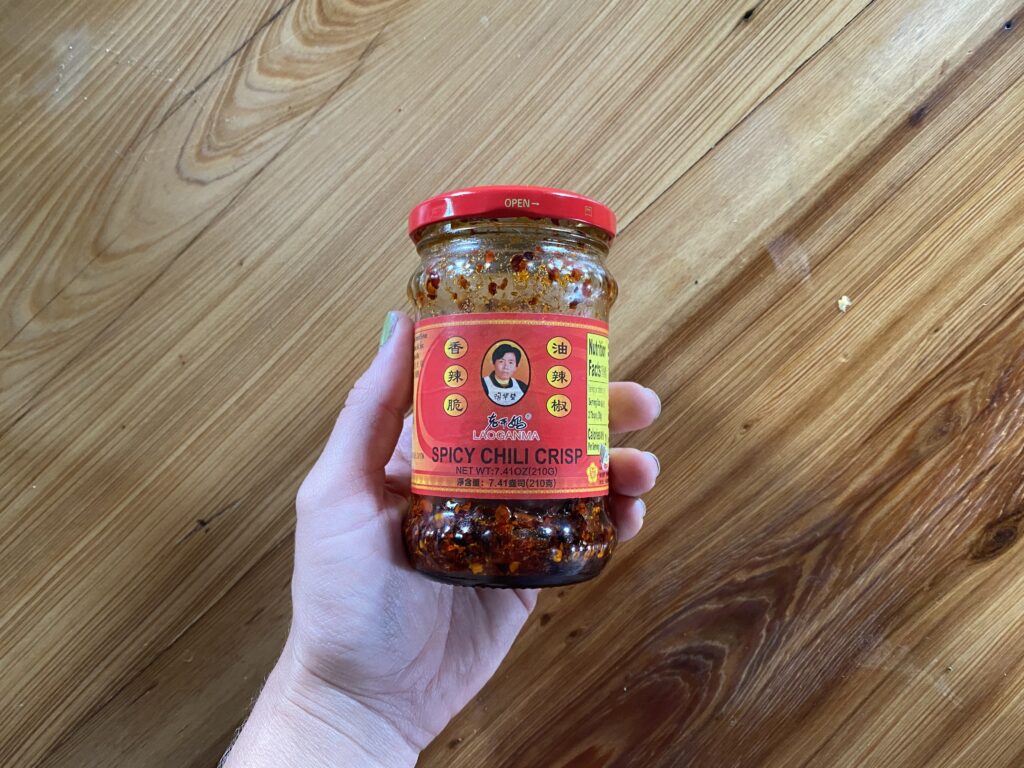 Lao Gan Ma, one of the most popular brands of Chili Crisp out there.
Wash and dry the green beans. Make sure they are all the way dry… that way the oil sticks. Toss them with a neutral oil like peanut oil. Toss them enough to coat the beans and spread them out on a sheet pan. Preheat the broiler and pop them in an oven. The timing will vary on the strength of your oven + broiler. We are aiming for a deliciously blistered green bean - not burnt. Let them get some color.
While they are broiling, put a nice giant generous scoop of chili crisp - might be even more than you think - in a big bowl. Because we want to achieve a sweet & sour green bean, mix some sugar (we used granulated sugar - but you could use honey or brown sugar). If it’s feeling too thick - add a tiny bit of peanut oil or whatever neutral oil you are utilizing to make it more of a dressing. Add some kind of salt to the mix. We used salt because we didn’t have soy, but soy would work wonderfully. Last but not least, add some acid! We used white wine vinegar, but rice vinegar or a bunch of lime juice would be ideal. This is a loose recipe with no set measurements… taste test the mixture. If it’s super spicy and you want it sweeter, add more sugar. Don’t shy away from the acid! Make sure to salt them well. As soon as the green beans are done and while they are still piping hot, put them in your big bowl full of dressing and stir it all together. Sprinkle it with a fresh herb like cilantro and ENJOY!
CSA BOX CONTENTS WEEK OF MAY 31ST
05/28/21 — Farm
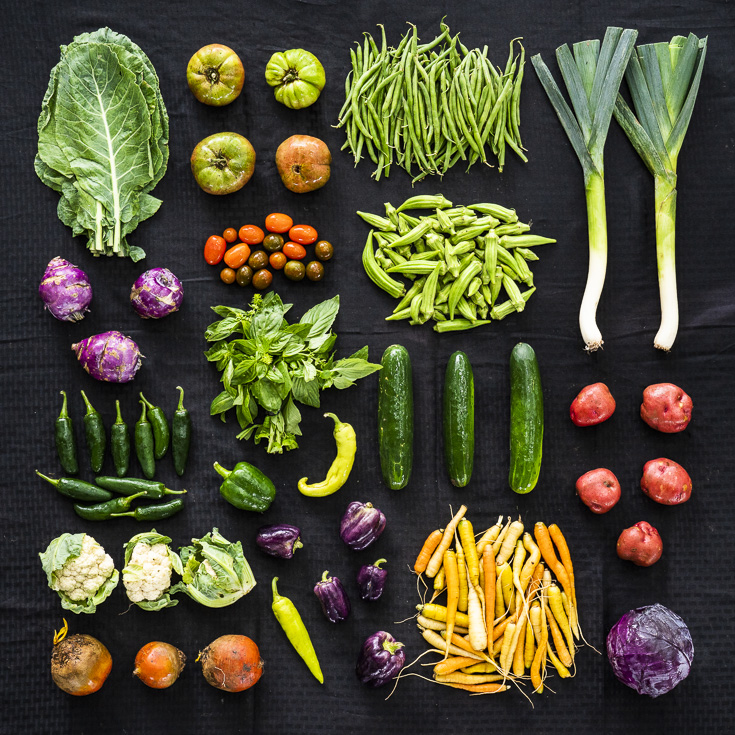 CSA Box Contents Week of May 31st
Individual: Green Beans, Cauliflower, Potato, Cucumber, Leek
Small: Green Beans, Beet, Cabbage, Potato, Harvest Highlight, Leek, Herb
Medium: Green Beans, Cauliflower or Cabbage, Potato, Cucumber or Squash, Collard Greens, Herb, Tomato, Harvest Highlight, Carrot
Large: Green Beans, Beet, Cauliflower or Cabbage, Potato, Cucumber or Squash, Collard Greens, Herb, Tomato, Harvest Highlight, Carrot, Onion


 0 ITEMS IN CART
